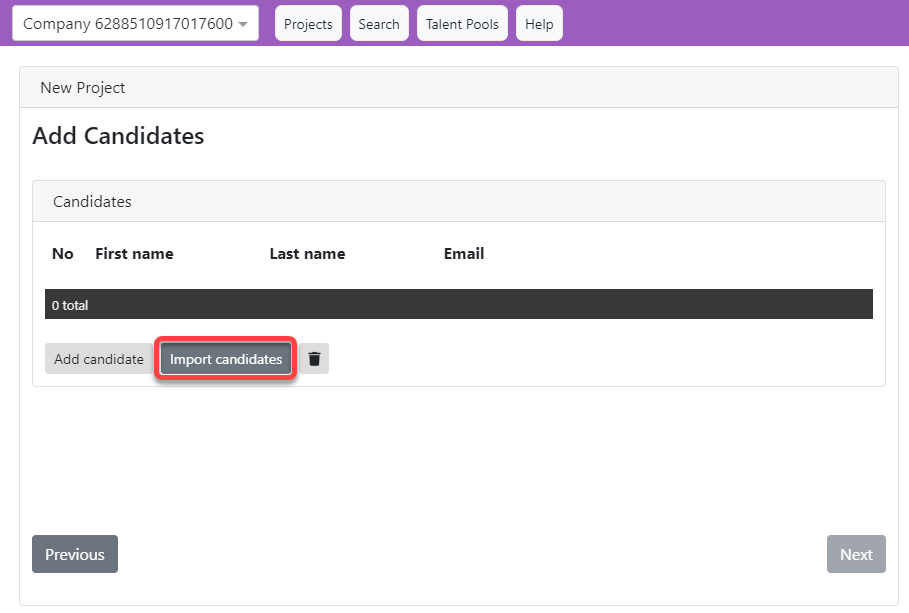
When adding candidates to a new project, it is possible to add a list of candidates in a .csv file using the highlighted button on the screen shown after creating a project name .. see Create a Project:
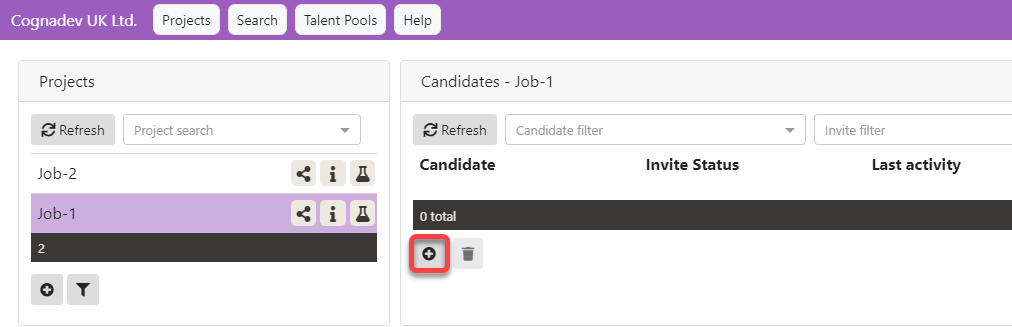
or when adding candidates using the highlighted icon in the Candidates area of an existing Project screen:
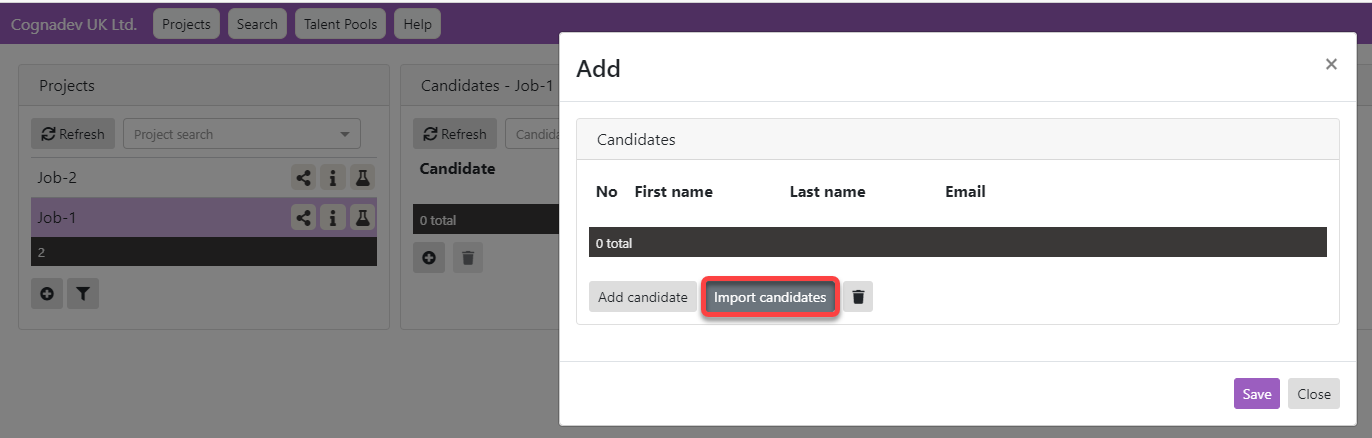
which shows a pop-up screen:
The .csv files can easily be generated from standard Excel .xls or ,xlsx file formats by simply saving an Excel file is as a .csv format file.
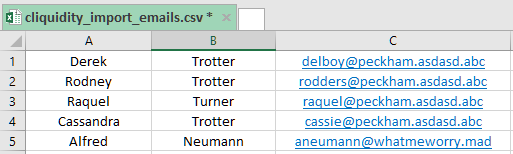
An example Excel file saved as a .csv, in Excel, looks like:
Column "A" = First Name Column "B" = Surname Column "C" = Email address
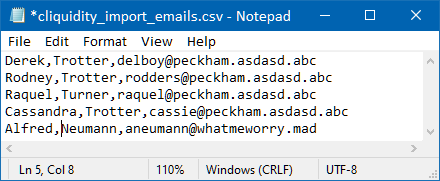
If opened in a text editor or say Windows Notepad, it looks like:
|

So. let's add the .csv file to our project.
An select-a-file for import folder is shown first:
which, when selected, imports the data into the currently chosen/selected/active project:
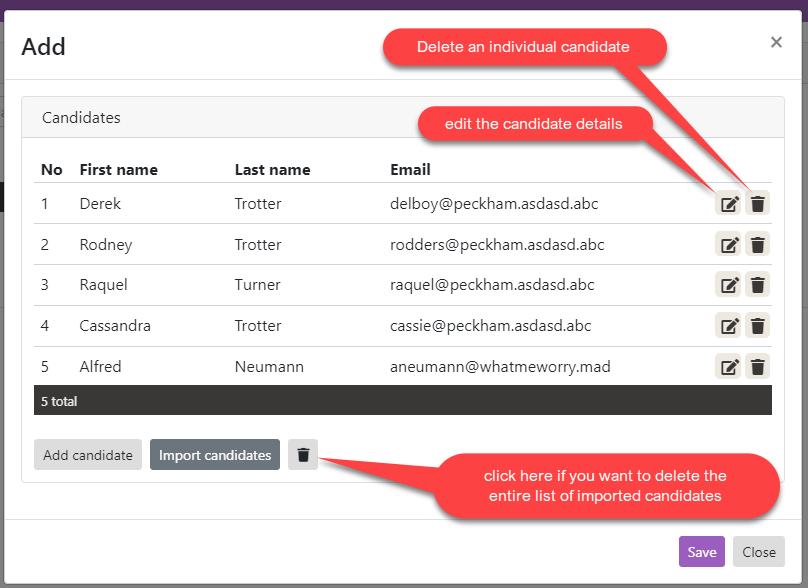
Clicking on the "Save" button returns you to the Candidate screen:
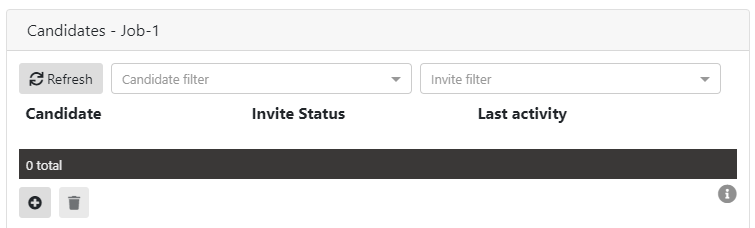
Initially you will see no change at all on-screen:
But, if you click the Refresh button: 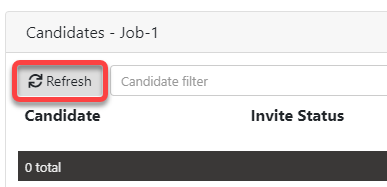
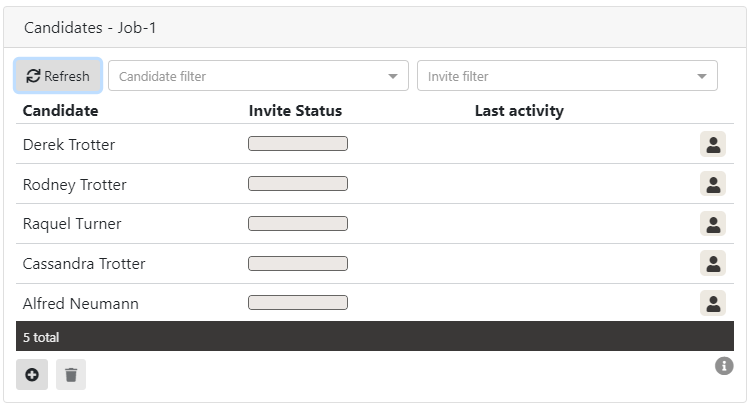
The new candidates will appear in the refreshed areas:
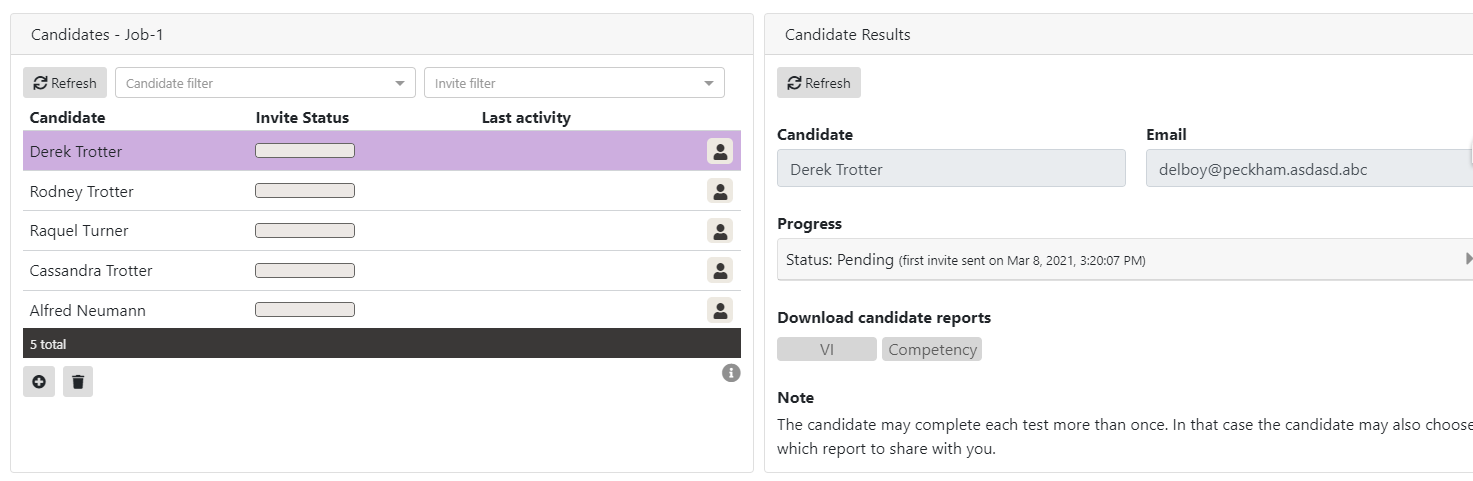
Clicking on a candidate name shows:
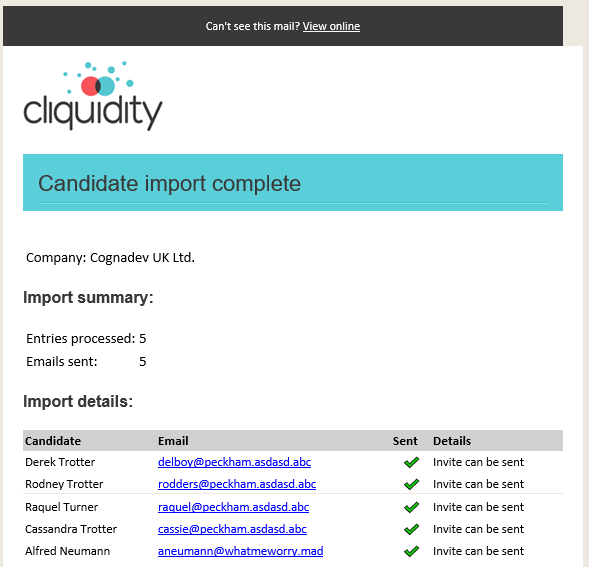
By adding candidates to this project, all are automatically sent invitations to complete the project assessments via email. But because all email addresses were false, all will have failed so the system will not show any "Last Activity" entries for any candidate.
However, when these candidates were added to the system, you will also be sent a confirmation email to your client-account email address: