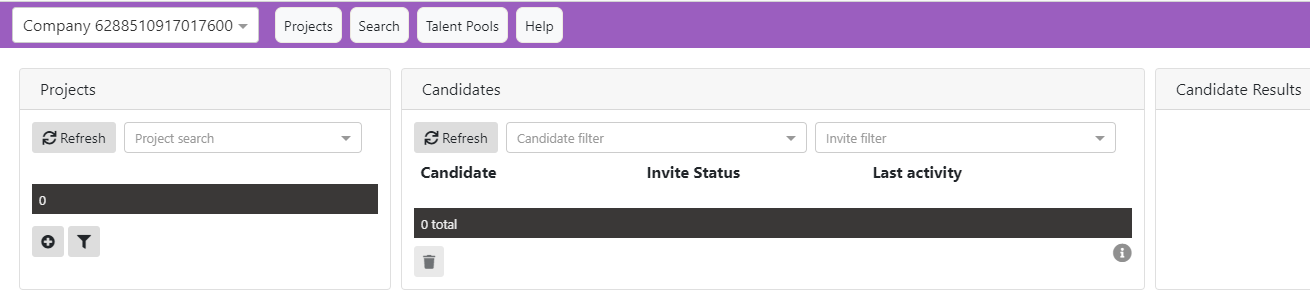
When you login as a business user for the very first time, you will be seeing the following screen:, which is the default opening screen for Cliquidity "Business", and which is viewed if you were to click on the ![]() button in the menu bar. The
button in the menu bar. The ![]() button accesses the online help (from which the pdf help manual is created).
button accesses the online help (from which the pdf help manual is created).
Taking a closer look at the Projects screen. we can see 4 important functions available for selection:
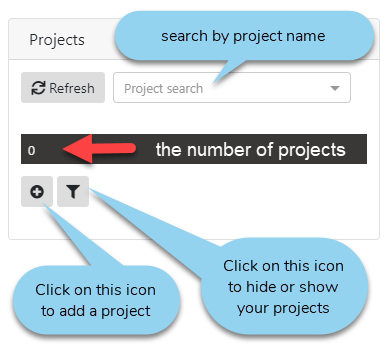
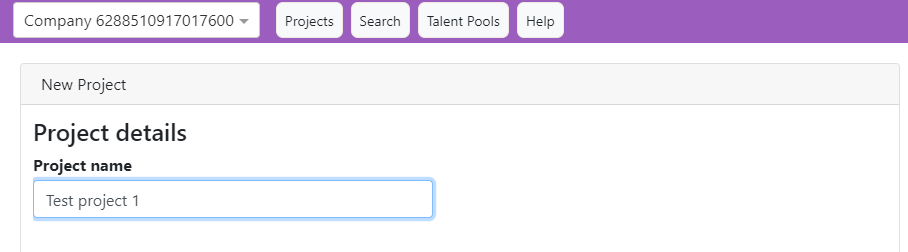
So, adding a project begins with clicking on the ![]() icon. This shows a dialogue asking you for a project name. I'm using "Test project 1" ..
icon. This shows a dialogue asking you for a project name. I'm using "Test project 1" ..
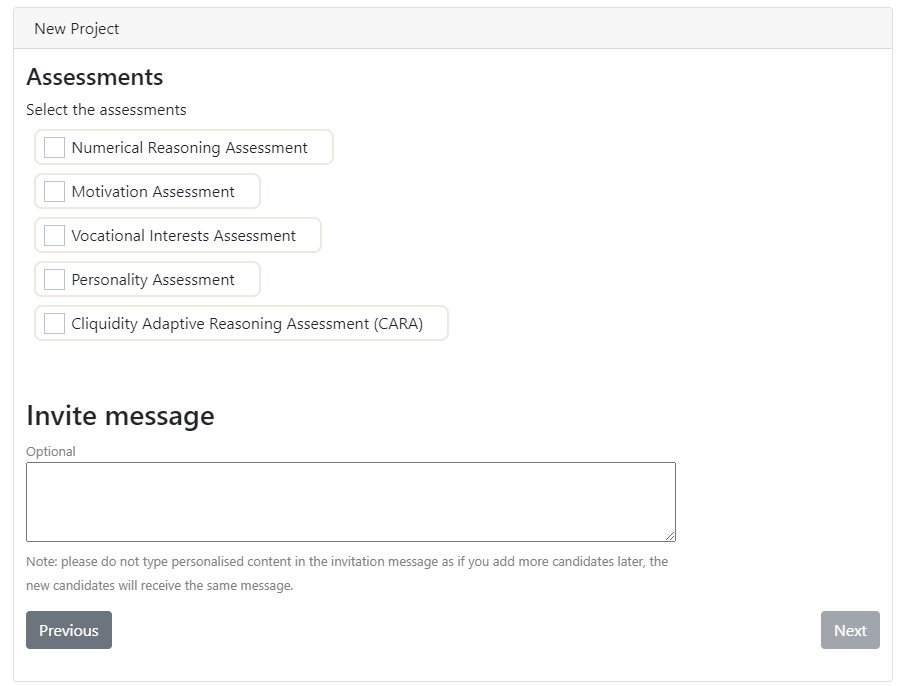
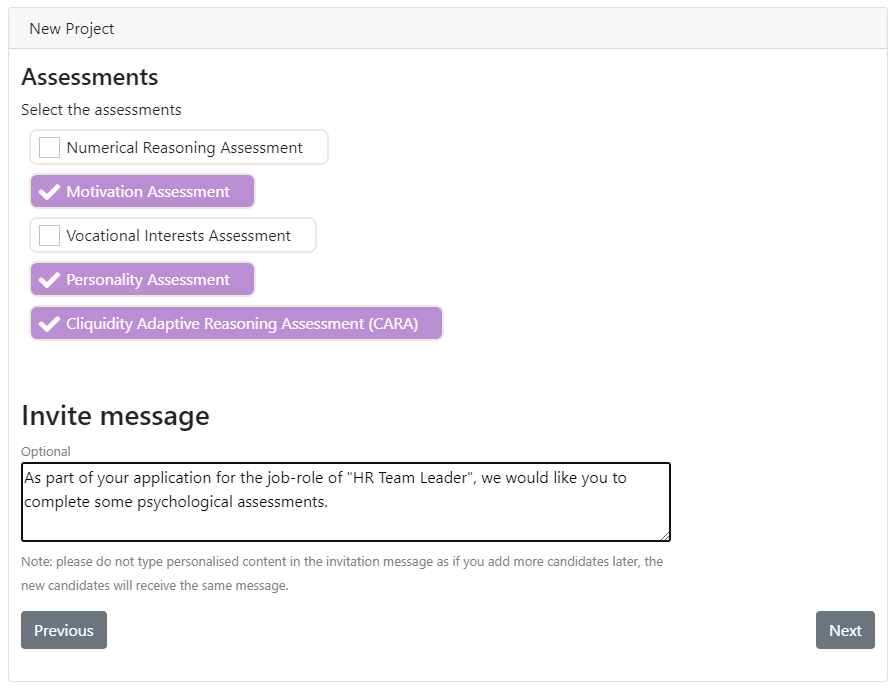
I then click on "Next" and open the dialog which allows me to specify which assessments are required from candidates who will be constituent members of this project. This definition will apply to candidates not just invited now, but any future ones, until I change these specifications.
Also, note I can now create the message I wish to be included in my email invitation to candidates for this project.
My completed information looks like:
When I click on "Next", I see:
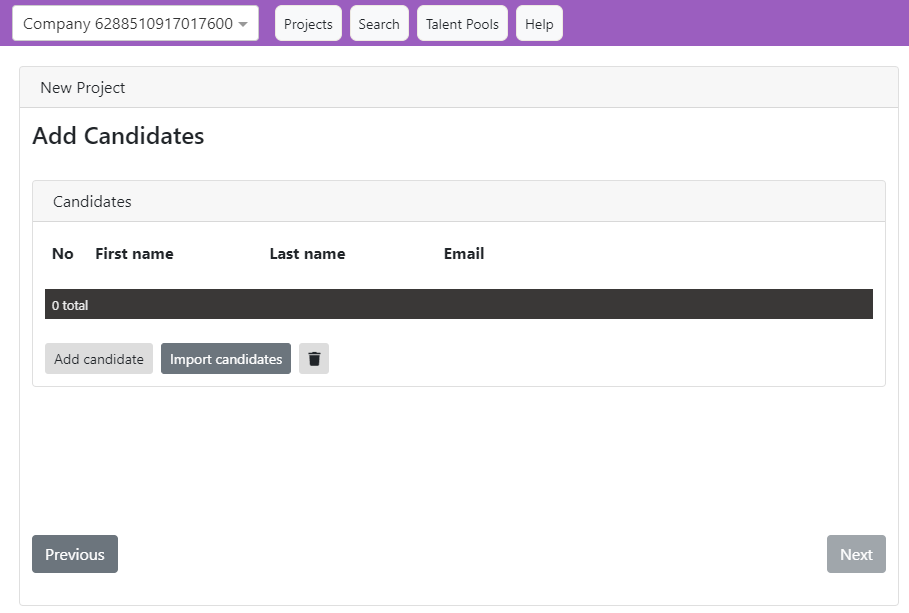
Note, you must add at least one candidate here. You cannot proceed further in the project creation process until you add one or more candidates. |

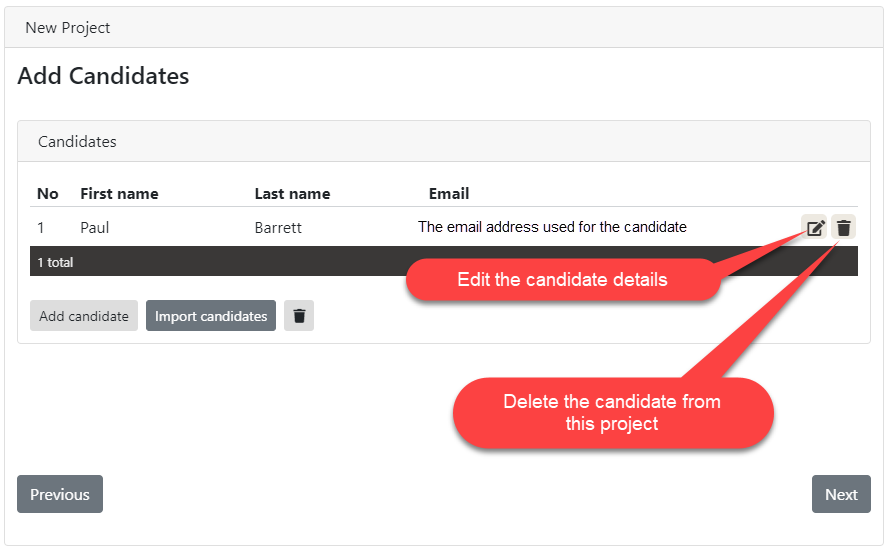
Clicking on the ![]() button allows me to add a single candidate to my project:
button allows me to add a single candidate to my project:

Be very careful here because if you misspell the candidate name or make a mistake in entering the email address, the system will nevertheless accept your information and proceed onward irrespective of any entry errors, as the example below shows. The system does not report email failures. |
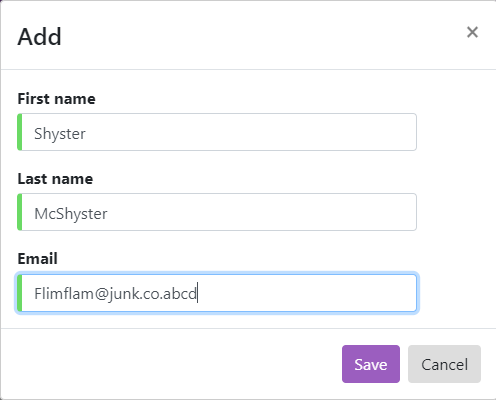
So, back to my valid entry .. Clicking on Save shows ...
The |
So, clicking on "Next" shows:
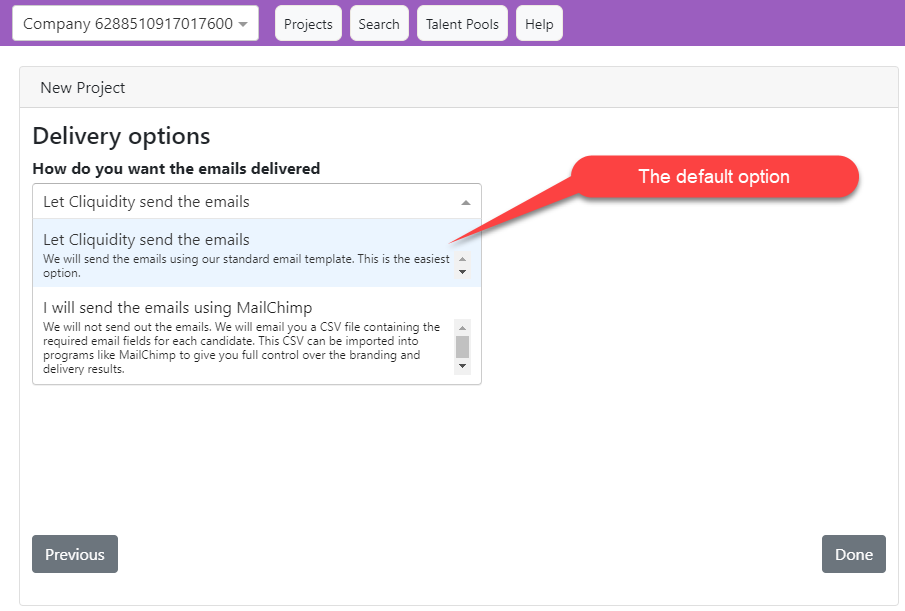
Since I want Cliquidity to send the emails on my behalf, I just click on ![]() and the process concludes:
and the process concludes:

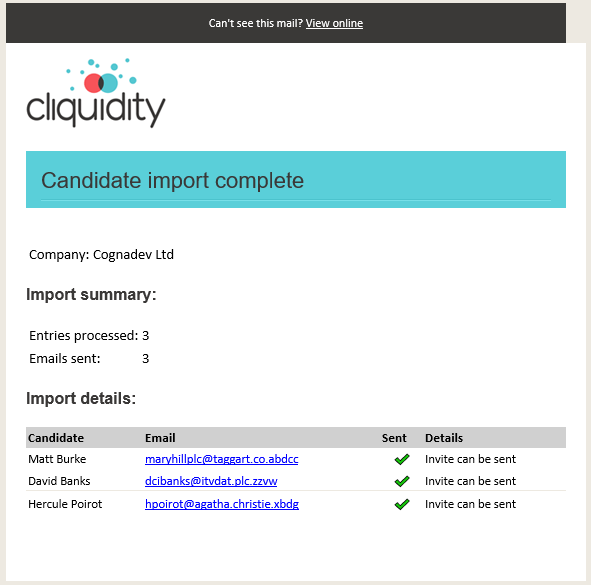
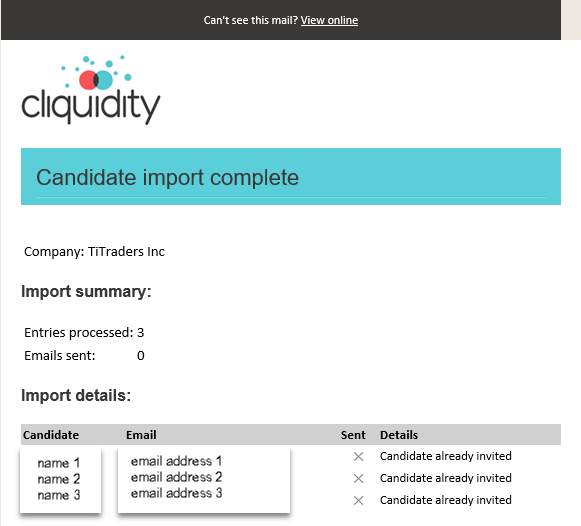
When adding candidates to a new project (as above), as soon as you proceed beyond the "How do you want the emails delivered" screen, choosing "Let Cliquidity send the emails, a notification email will be sent to your account listing the candidates you have invited. E.g.
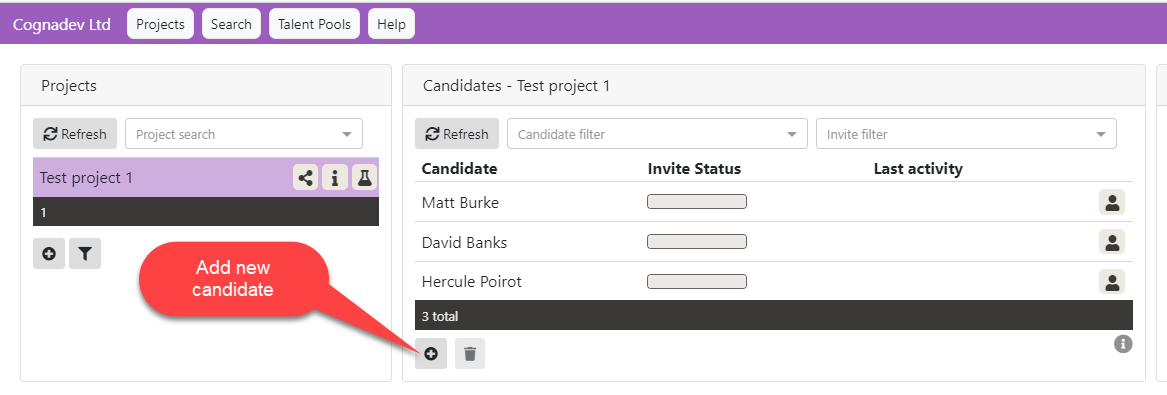
When adding candidates from then on, using the "Add New Candidate" icon button:
Every individual candidate entry will generate a separate email to your account if you complete the entire process each time, notifying you that an invitation email is being generated. If you invite 100 candidates this way over the course of a day, (one by one , with a final "Save" command between each), you will receive 100 notification emails.
Every "Final Save" command initiates a notification email.
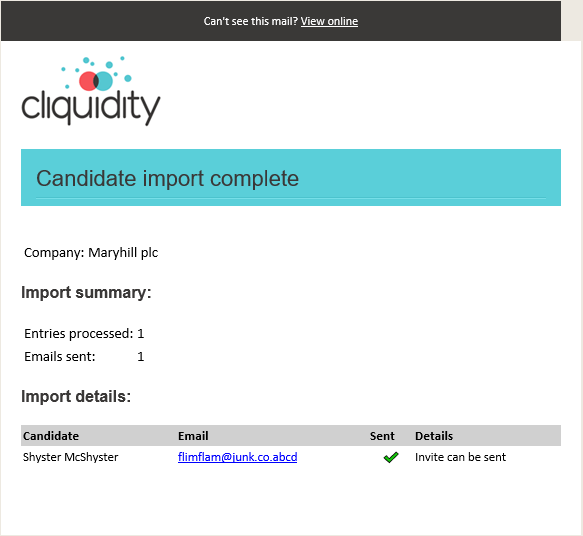
But if you enter candidates one-by-one without initiating a "Final Save", then the system will send you a single notification email containing a list all candidates being sent an email invitation. E.g.
The "Final Save" process is demonstrated in this brief video:
The "Final Save" procedure
|


Clicking on ![]() shows:
shows:
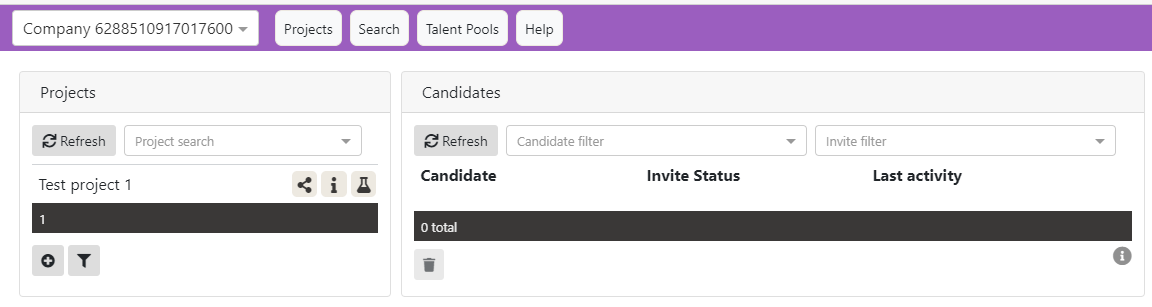
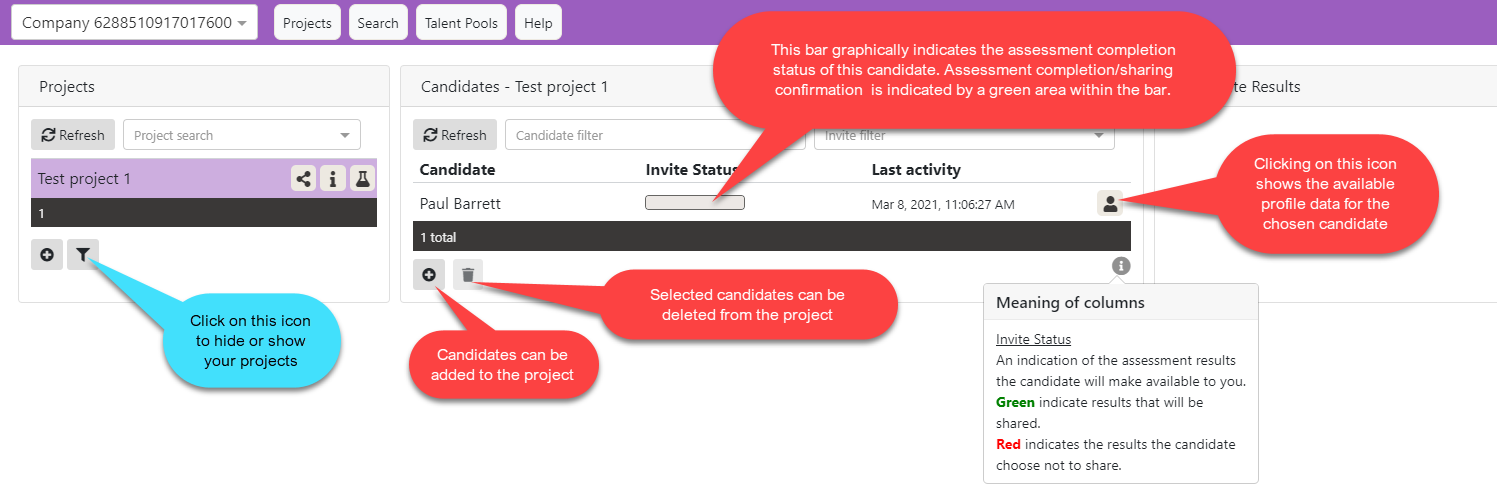
So. we can now see the name of the project we just created. But, because we have not selected the project by clicking on it, the candidate I added is not displayed. But note that now, three new icons have appeared on the Projects Screen ![]()
As I run the mouse cursor over them you'll see the descriptions:
Project Icon definitions
Clicking on ![]() shows the nomination code screen. See the Nomination Button section for more details.
shows the nomination code screen. See the Nomination Button section for more details.
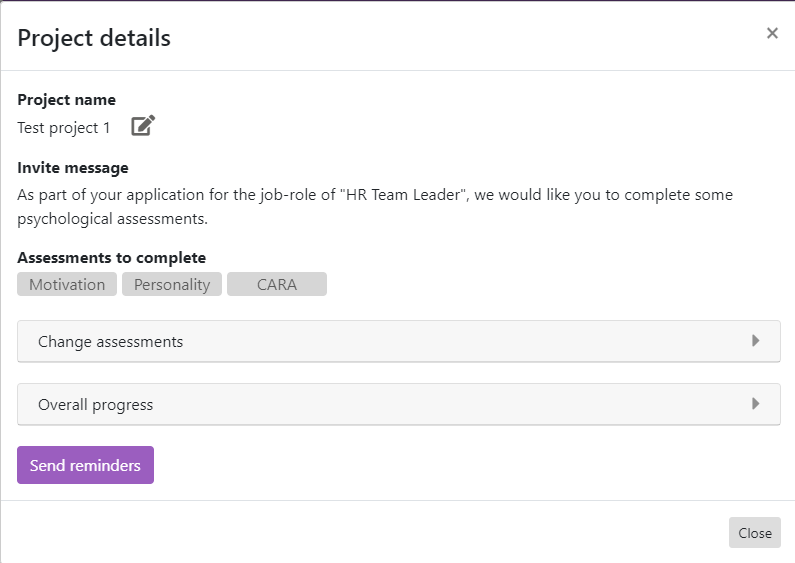
Clicking on ![]() shows the Project details screen:
shows the Project details screen:
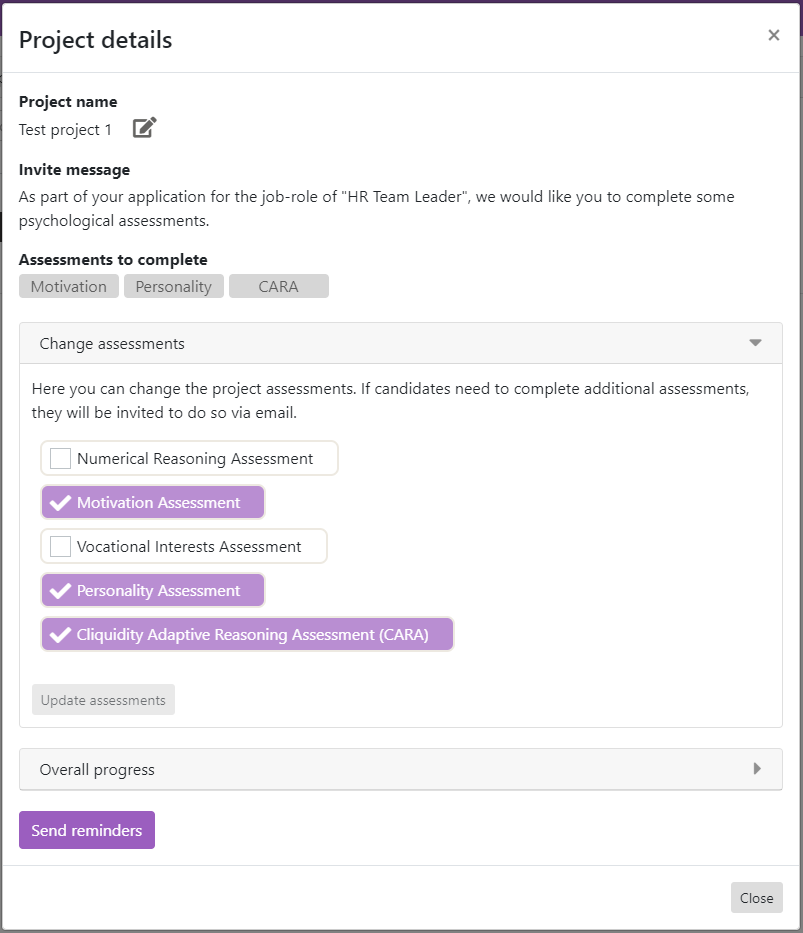
where you can change the assessments required of candidates invited to this project:
or check on the Overall Progress/Status of the Project:

You will note that selecting any of these icons also shows the candidate information associated with the project. The same information is displayed if you simply clicked on the project name itself. |
--------------------------------------------------------------------
© Cognadev Chemistry Ltd: 2021